

Honestly, who doesn’t love pizza? That feeling of biting into the perfect pie, with its melted cheese and tomato sauce, is truly unparalleled.
But you know what’s even better? Homemade pizza. If you’ve never tried making your own pizza at home, then I can tell you, you’re definitely missing out. In case you are scared about how it’ll turn out, take it from me, it’s almost too easy!
Other than the ingredients, if you just have a regular oven, all you need to add to the mix is a pizza stone. In this article, I’ll give you a rundown of what a pizza stone is and what it does, of course, but more importantly, how to use one.
So, keep reading to find out how your homemade pizza dreams can come true!
What Is A Pizza Stone?
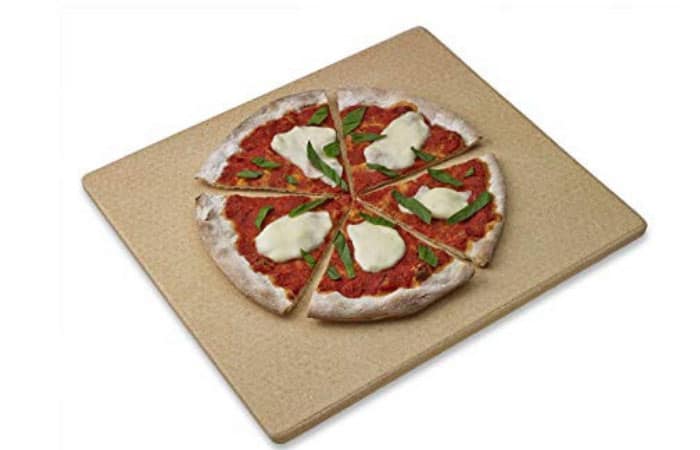
A pizza stone is basically a hard, flat disc. It’s extremely tough, as it’s made from stone (hence the name), or ceramic. They can be used in both ovens and grills.
Pizza stones work by absorbing excess moisture from the dough. This is achieved by the stone’s porous surface.
Moreover, because they can spread out the heat evenly, they have the ability to mimic the bottom of an extremely hot wood-burning oven. This prevents hot spots on the pizza and gives it a nice, crispy crust.
Fun fact—you can also use these guys to make bread, biscuits, and cookies!
Types of Pizza Stone
Pizza stones vary greatly. For starters, size is an important consideration. You can get individual-sized ones for little pizzas or big ones for big parties. They come in two standard shapes—rectangular and circular.
The type also matters in terms of cooking—some pizza stones will require seasoning before they can help you achieve the perfect pizza.
If your pizza stone has an enamel coating, you won’t need to season. In case it doesn’t, then usually you’ll have to coat the surface with vegetable oil.
That’s enough information about them. The real question is, why should you use a pizza stone?
Why Use A Pizza Stone?
The straightforward answer is because regular ovens are not designed to cook pizza properly.
Without a pizza stone, you won’t be able to achieve the required high heat levels without overcooking the pizza toppings. You might get a crispy crust, but the contents of the pizza itself will likely disappoint you.
Pizza stones, however, act as a point of heat transfer. Think of it as the arbiter between two unwilling parties: your pizza, and your oven.
Usually, you’ll also need a pizza peel. That’s basically a shovel-like tool which you will use to slide the pizza out when it’s ready.
How to Use A Pizza Stone
I hope you’ve acquired your pizza stone because now it’s time to get down to business. Before you get your dough ready, you’ll have to decide whether your pizza will be baked or grilled.
Baked Pizza
Take your pizza stone and place it on the lowest rack of your unheated oven. Once the stone is safely inside the oven, go to town with that temperature setting!
Seriously, turn it up high—at the highest setting possible. This is important if you want that standard, slightly charred flavor we all love in our pizzas. Now, let the stone preheat for at least an hour.
Get some cornmeal, or regular flour, and scatter it out across the peel. This will ensure that your pizza doesn’t stick.
At this stage, your dough should be rolled and ready to go. Then take your pizza peel. Take the pizza onto the peel, and after you have added your desired toppings, you will slide it into the oven.
After the one-hour preheat time for your stone has passed, carefully slide the pizza onto the stone directly from the peel.
The great news is, it’ll take only a few minutes for your pizza to get done baking. Even for bigger pizzas, only 6/7 minutes will do.
Some people like turning the pizza over halfway (at a 180° angle) while in the oven. This ensures that one side won’t get overcooked. However, this part is up to you.
Once that’s done, use your peel to remove the pizza from the stone. It’s time to eat!
Grilled Pizza
The steps here are quite similar. Just like baked pizza, your stone will require preheating for grilled pizza as well.
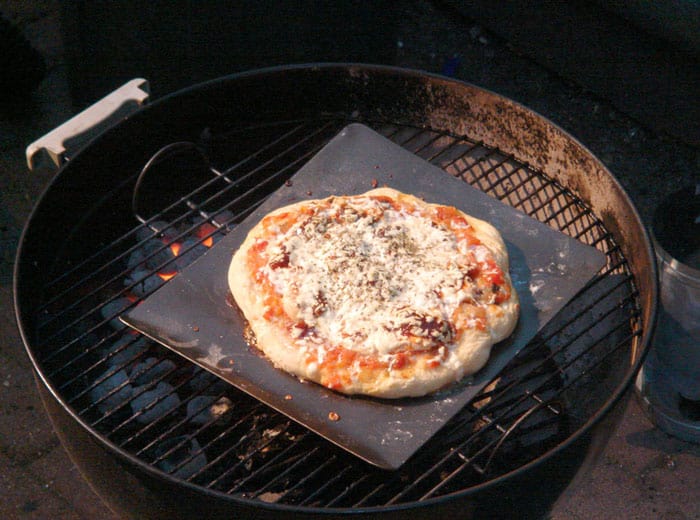
However, in the case of a grill, your pizza stone will need to be heated on a medium flame as opposed to a much higher heat level when using an oven.
Take your stone, put it on a cold grill, close up the top, then get the heat going. The rest of the process is pretty much identical to what I’ve described above. Just repeat the steps with your dough, toppings and everything else.
Don’t forget to use cornmeal or loose flour on your pizza peel if you don’t want your pizza to stick to the peel!
Frozen Pizzas
Not all of us have the time or patience to sit around crafting an entire pizza, dough and toppings and all. And that’s okay because you can just pick up a frozen pizza from the store these days. And yes, your stone is compatible with those as well.
In fact, using a stone for your frozen pizza will actually give it a much crispier base, as opposed to just putting it straight into the oven. However, there are some risks you should know about.
To begin with, the difference in temperature is quite high—your pizza will be very cold, and your stone will be very hot. This might sometimes cause the stone to crack (eep!). This is just a possibility, but in my opinion, it’s best not to risk it.
The best way to avoid this is to let the frozen pizza thaw for a bit inside the oven; a minute or so should do it. Once that’s done, you can move the pizza to the stone.
Remember to keep a close watch on the frozen pizza as it bakes. As you are using a stone, the pizza will cook much faster than the indicated time. So, if you don’t keep a close watch, you might end up with a burnt pizza, or one with uncooked toppings.
That’s Not All
Now that you know the basics of how to use a pizza stone, you can really go all-out. With enough practice (and it really doesn’t take much), you can start thinking about creating more types of pizzas.
I’m talking about Neopolitan, deep-dish, and even thin-crust! Now that you have a pizza stone, nothing should stop you from experimenting. The sky’s the limit when it comes to choices of toppings, pizza sauces, and cheese.
Trust me; this pizza stone will change your life. Now, keep reading for a few additional tips!
How to Clean A Pizza Stone
Remember how I said earlier that pizza stones are extremely porous?
That basically means you’ll have to be careful how you clean it. Only use hot water and use a stone brush—never use scrubbers or abrasive metal.
Furthermore, it’s very important to remember that you should never use soap or other chemicals to clean it, because it might transfer onto any pizzas you bake, or grill since the soap will get sucked into the pores.
If any ingredients get stuck on the surface of the stone, place it in your oven on the highest temperature setting and leave it there until you can scrape off the unwanted material. Don’t worry about stains, though because that’s normal.
Conclusion
Now that you have a basic idea about pizza stones, you’re probably wondering why you didn’t think of getting one sooner, right?
Just think of the possibilities! I’d be excited too if I were you. Go forth now, armed with this knowledge, and make the pizza of your dreams!
Good luck!
Don’t call it a ‘pie’. It’s just weird. Literally no one ever calls it a ‘pie’. You only call it pizza.